■前提
Shopify ピクセルで成果を計測する場合、カスタムピクセルを利用して計測を行う必要がございます。(管理画面より取得するグループ成果タグはそのままでは利用が行えません。)
カスタムピクセルの仕様上、JSタグの設置が不可となりますので専用のタグを作成して設置を行う必要がございます。
※Shopifyの仕様変更に伴い追加スクリプトへのJSタグ設置が難しくなっております。
1.概要①ITP対策を行う。
※ITP対策の方法は2種類ございます。 (どちらかを選択して実施します。)
・グループ計測タグをLPに設置して対策を行う方法
・リダイレクタ設定を行い対策を行う方法(Shopifyドメインが独自ドメイン利用時のみ可能
②カスタムピクセルへ設置する成果タグを作成する
③カスタムピクセルへShopify専用成果タグを設置する
①グループ計測タグを取得します。
グループ計測タグは下記ページを参考に取得ください。
参考:「ITP対策:グループ計測タグ(JSタグ)を利用した計測方法」
②グループ計測タグをShopifyへ設置します。
・Shopifyへログインいたしまして左メニュー「オンラインストア」内の「テーマ」を選択します。
・利用テーマの横に点が3つ並んでいるボタン(ミートボールメニュー)より「コードを編集」を選択します。
・「index.liquid」または「theme.liquid」を選択
・body内に計測タグを設置・保存します。
参考動画)
https://drive.google.com/file/d/1HLA6upY8TBc3IhAy6r7VRpPShKoFByMa/view?usp=sharing
③グループ計測タグをShopify(詳細管理ページ)へ設置します
・Shopifyへログインいたしまして左メニュー「商品管理」商品 > 説明で「htmlを見る」を選択します。
・タグ編集より『グループ計測タグ』を設置します。
※設置する際は<>ボタンを押してから設置してください。


3.リダイレクタ設定を行う方法
※グループ計測タグを設置する方法を利用しない場合はこちらをご設定ください
※グループ計測タグを設置する方法の場合は不要となります、
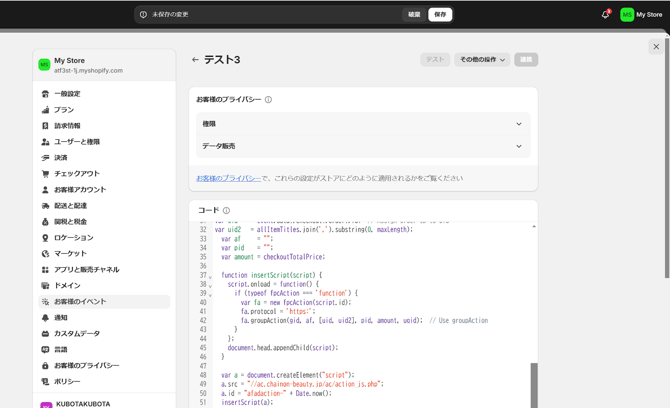
4.Shopify専用成果タグを作成します。
・グループ成果タグを取得します。
タグ管理>グループ成果タグ一覧より対象グループのJSタグより取得します。
・Shopify専用成果タグのフォーマットに取得したグループ成果タグの情報を入力します。設置していただきたいタグ
●Shopify専用成果タグフォーマットanalytics.subscribe('checkout_completed', (event) => {
const checkout = event.data.checkout;
const checkoutTotalPrice = checkout.totalPrice?.amount;
const allDiscountCodes = checkout.discountApplications.map((discount) => {
if (discount.type === 'DISCOUNT_CODE') {
return discount.title;
}
});
const firstItem = checkout.lineItems[0];
const firstItemDiscountedValue = firstItem?.discountAllocations[0]?.amount;
const customItemPayload = {
quantity: firstItem?.quantity,
title: firstItem?.title,
discount: firstItemDiscountedValue,
};
const paymentTransactions = event.data.checkout.transactions.map((transaction) => {
return {
paymentGateway: transaction.gateway,
amount: transaction.amount,
};
});
var gid=⚫️;
var sid="";
var uid1 = event.data?.checkout?.order?.id;
var uid2="";
var uid3="";
var uid4="";
var uid5="";
var uid6="";
var uid7="";
var uid8="";
var catsPoint = "";
var amount = checkoutTotalPrice;
var uqid = "785Nb9Ecf17a3E71";
var trackingUserId = "";
var firstCookie = document.cookie;
var catsOptions = {
fpc_id: "",
email: "",
phone: "",
fb: { eventId: "" },
tt: { event_id: "" },
line: { deduplicationKey: "" },
yahooDisplayAds: { convTransactionId: "" },
googleAdsClick: { order_id: "" },
xAds: { conversion_id: "" }
};
function insertScript(script) {
script.onload = function() {
if (typeof CATS_GroupAction === 'function') {
CATS_GroupAction(gid, sid, uid1, uid2, uqid, uid3, uid4, uid5, uid6, uid7, uid8, catsPoint, amount, trackingUserId, firstCookie, catsOptions);
} else {
console.error("CATS_GroupAction function is not defined");
}
};
script.id = "ac_⚫️⚫️⚫️⚫️⚫️";
script.onerror = function() {
console.error("Script failed to load.");
};
document.head.appendChild(script);
}
var a = document.createElement('script');
a.src = "//⚫️/ac/⚫️/action.js";
// a.src = "//⚫️/ac/⚫️/group.js";
a.async = true;
insertScript(a);
});
・取得したグループ成果タグ内の記述をShopify専用成果タグフォーマットの●●の箇所に上書きを行います。
■変更する箇所

4. Shopify専用成果タグをカスタムピクセルへ設置します。
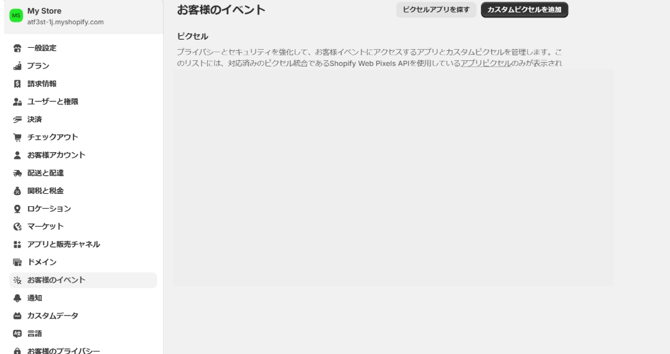
・Shopifyへログインいたしまして左メニュー内>設定を選択します。

5.タグの設置が完了いたしましたら、CATSで発行したクリックURLより成果テストをお願いします。
成果計測ができれば成功となります。